
BLOG
Anterior pelvic tilt from a photo: what a side view can and cannot measure
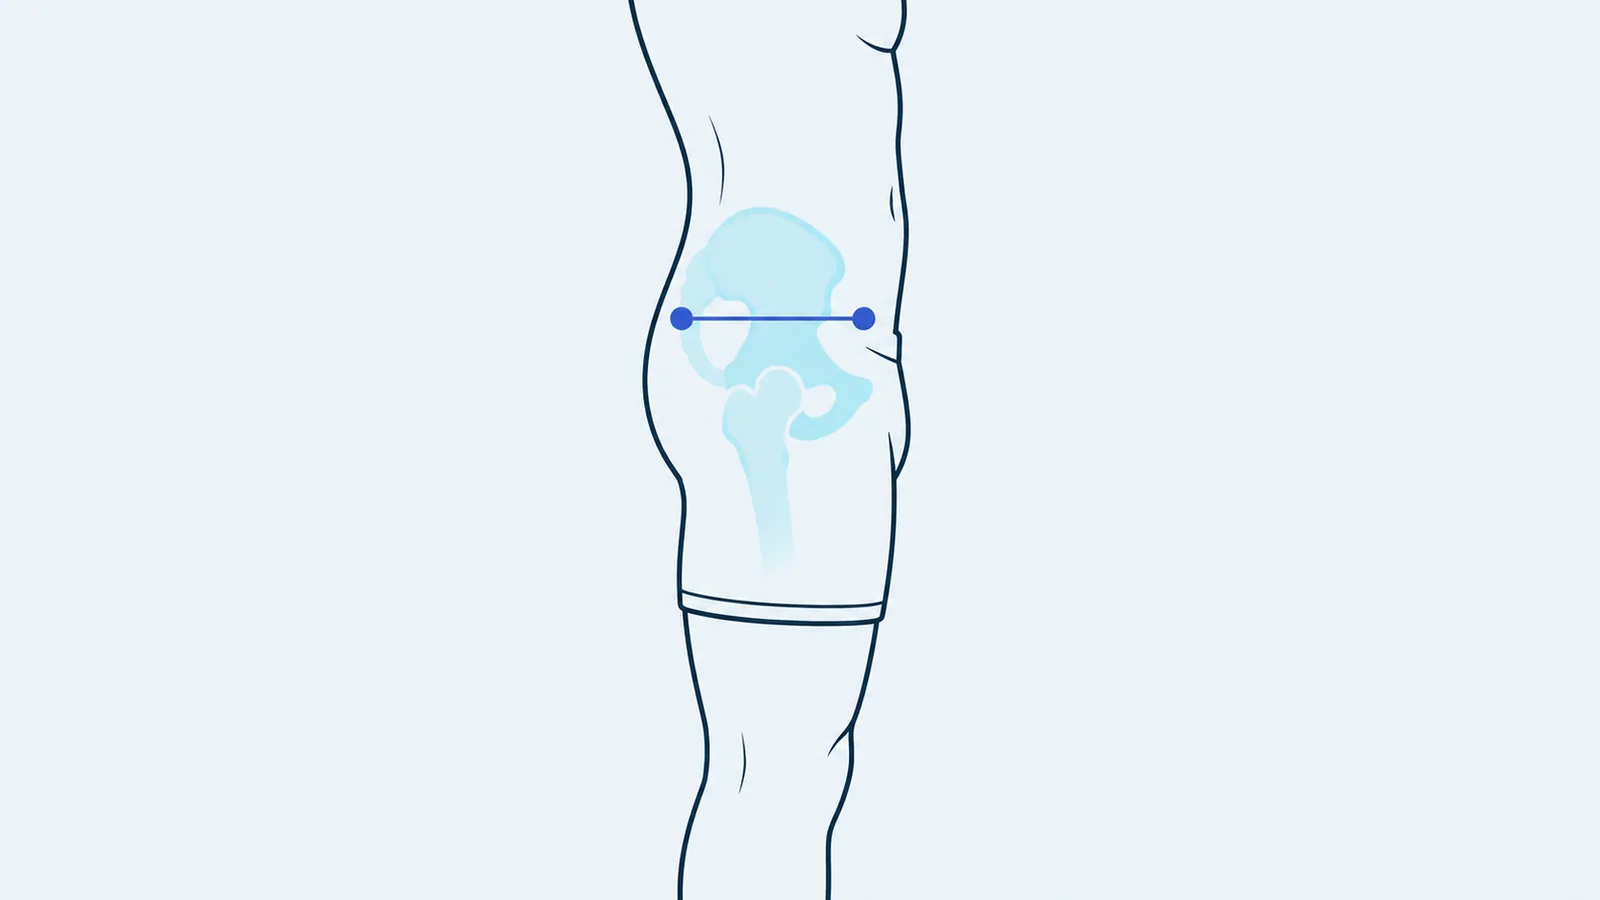
A side photo can show the outline of your hips and lower back, but it cannot measure anterior pelvic tilt the way clinicians define it: the angle of a line between two bony points on the pelvis, found by touch. Even that clinical angle depends on pelvic shape. In 30 cadaver pelves held in the same position, it ranged from 0° to 23°. Use a photo value, including PoseAlign's pelvic tilt, only to compare your own photos.
What anterior pelvic tilt means
Pelvic tilt is the position of the pelvis seen from the side, rotating about an axis that runs from one hip to the other. A 2021 clinical commentary on measures of pelvic tilt by Suits in the International Journal of Sports Physical Therapy describes how physical therapists usually express it: as the angle between a horizontal line and a line joining the anterior superior iliac spine (ASIS), the bony point at the front of the hip, and the posterior superior iliac spine (PSIS), the matching point at the back of the pelvis. Anterior pelvic tilt means the ASIS sits lower than the PSIS; posterior tilt means the reverse.
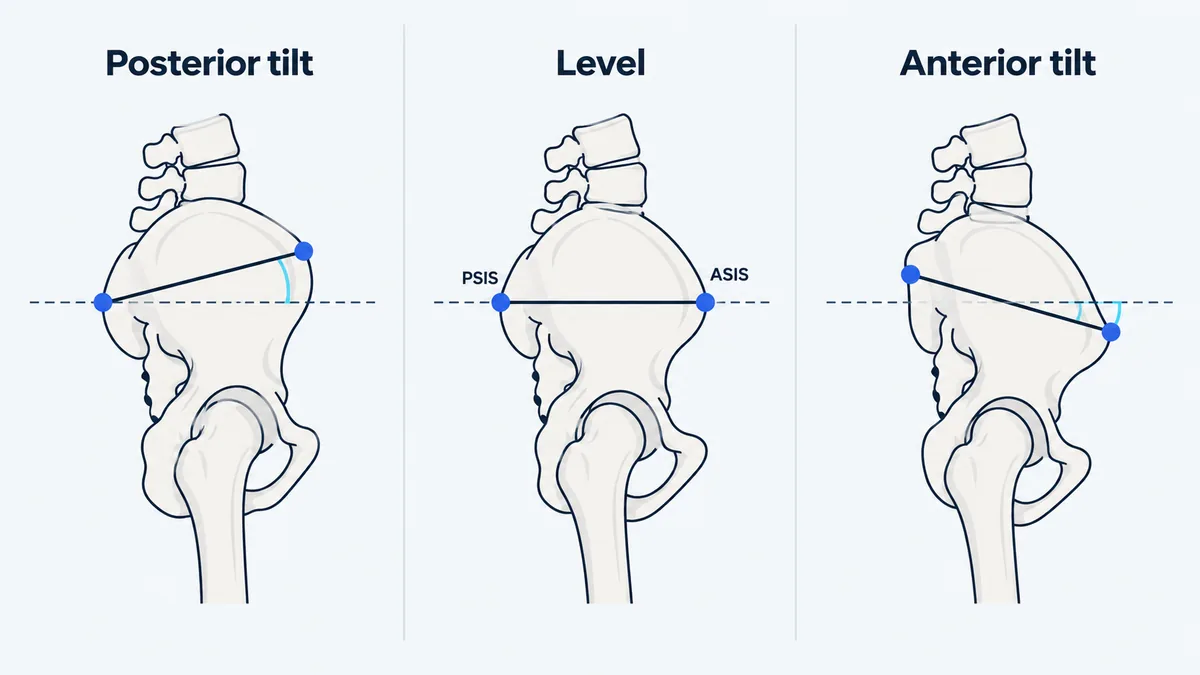
Some anterior tilt is common. Suits reports that in studies using a caliper-based inclinometer, most people without symptoms show some degree of anterior tilt, with wide variation between individuals, and that static standing measurements elsewhere in the body (knee, lower back, shoulder girdle) have a poor and inconsistent link with symptoms. It suggests comparing a person with themselves rather than with a predefined normal value.
How clinicians and researchers measure pelvic tilt
The common methods in physical therapy all measure the angle of the ASIS–PSIS line, and they differ in how much evidence supports them; X-rays, used before surgery, define pelvic tilt differently. Suits summarises the options this way:
| Method | What Suits reports |
|---|---|
| Visual assessment | No studies of its reliability or validity for pelvic tilt. |
| Hand-held inclinometer | Moderate to excellent reliability (ICC 0.60 to 0.94); no validity studies. |
| Caliper-based pelvic inclinometer, such as the PALM | Acceptable validity against X-rays for anterior and total tilt; Suits suggests inclinometers may be the better option. |
| Smartphone level app | Excellent repeat reliability for one examiner (ICC 0.97); no validity data reported. |
| X-ray | Used mainly for surgical planning, with several definitions and no agreed gold standard. |
The ICC (intraclass correlation coefficient) is a reliability statistic where 1 means perfect agreement. For a reader, the table means that looking at someone's pelvis from the side, without instruments, has not been tested for pelvic tilt at all.
Video methods also work from the ASIS and PSIS, marked on the skin first. A 2025 study in Sensors compared 2D video analysis in Kinovea software with a 12-camera 3D motion capture system in 13 adults without symptoms (Vicente-Pina et al., 2025). Reflective markers sat on both iliac spines and one camera stood 3 m to the side. For the total range of pelvic tilt movement, reliability within and between examiners was excellent (ICC above 0.90) and agreement with the 3D system was good to excellent. All 13 participants had a normal body mass index, so the authors could not assess the effect of abdominal fat.
Why a photo cannot see the pelvic tilt angle
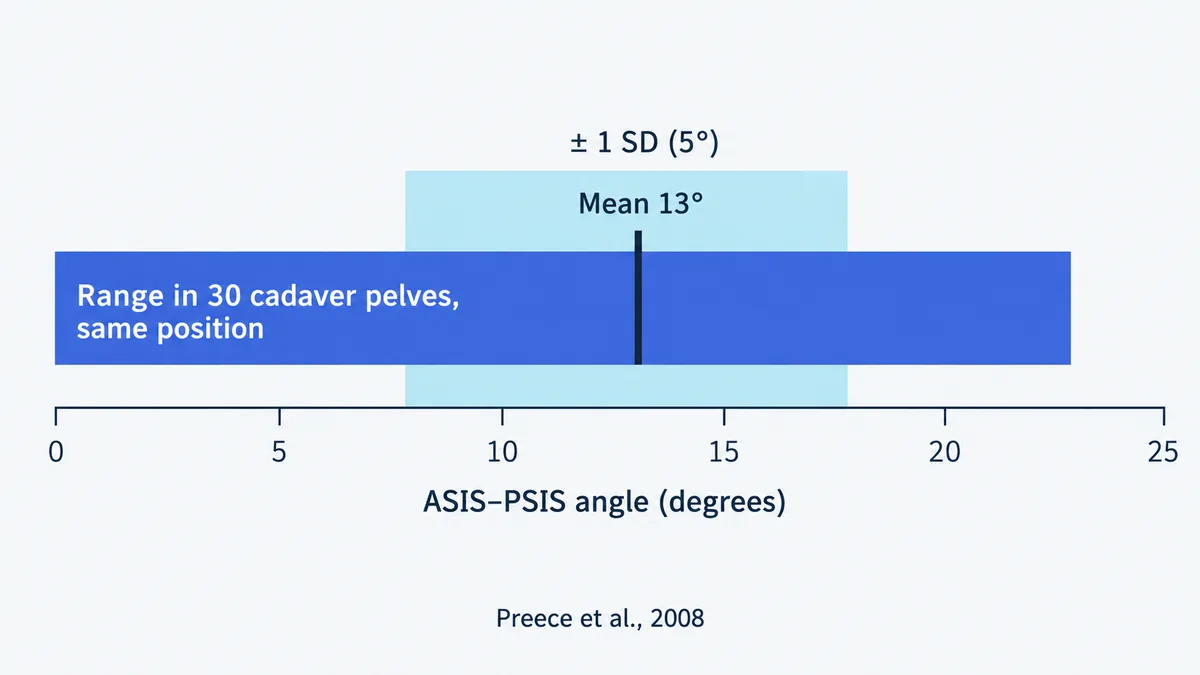
The ASIS–PSIS angle depends on the shape of each pelvis as well as its position. A cadaver study by Preece et al. (2008) fixed 30 pelves in the same anatomical position and still found ASIS–PSIS angles from 0° to 23°, with a mean of 13°. Because the position was the same, the authors attribute the spread to differences in bone shape, not posture. They concluded that the angle should not be used in isolation to assess pelvic orientation. Two people with identical posture can therefore differ by many degrees, and a photo cannot tell shape from position.
A photo app without skin markers cannot see the ASIS or PSIS at all. Google's MediaPipe Pose Landmarker, a widely documented pose model, tracks 33 body points. Around the pelvis it has one left and one right hip point, and no point for either iliac spine. Any pelvic tilt an app calculates from points like these is an angle the app defines for itself, not the clinical ASIS–PSIS measurement. Surface cues such as a sloping waistband or a deep curve above the buttocks depend on clothing and body shape in the same way.
What changes a pelvic tilt reading in a side photo
Anything that hides the hip outline, moves the detected hip point or changes your stance can change the estimate:
| Factor | What it does | What to do |
|---|---|---|
| Waistband, belt or a long, loose top | Hides or reshapes the outline of the hip and lower back, so the detected point may move. | Wear the same fitted shorts or leggings and fitted top each time, with no belt. |
| Belly and soft tissue | The body outline sits further from the bone. The 2025 marker study above included only people with a normal body mass index, so it could not measure this effect. | Compare only with your own earlier photos. |
| Arm position | In a profile, a hanging arm and hand lie over the hip region and can pull the hip point toward the wrist. | Keep the arm in the same relaxed position and check where the hip point landed. |
| Body turned toward the camera | The front and back of the pelvis no longer line up in the image. | Stand fully side-on, feet parallel to a line on the floor. |
| Phone tilted | The image's horizontal tilts, and every angle measured against it. | Use a stand and keep the phone level, at the same height and distance. |
| Stance at the moment of capture | Locking or bending the knees, leaning or slumping moves the pelvis itself. | Settle into your usual stance and look straight ahead before the timer fires. |
How PoseAlign reports pelvic tilt
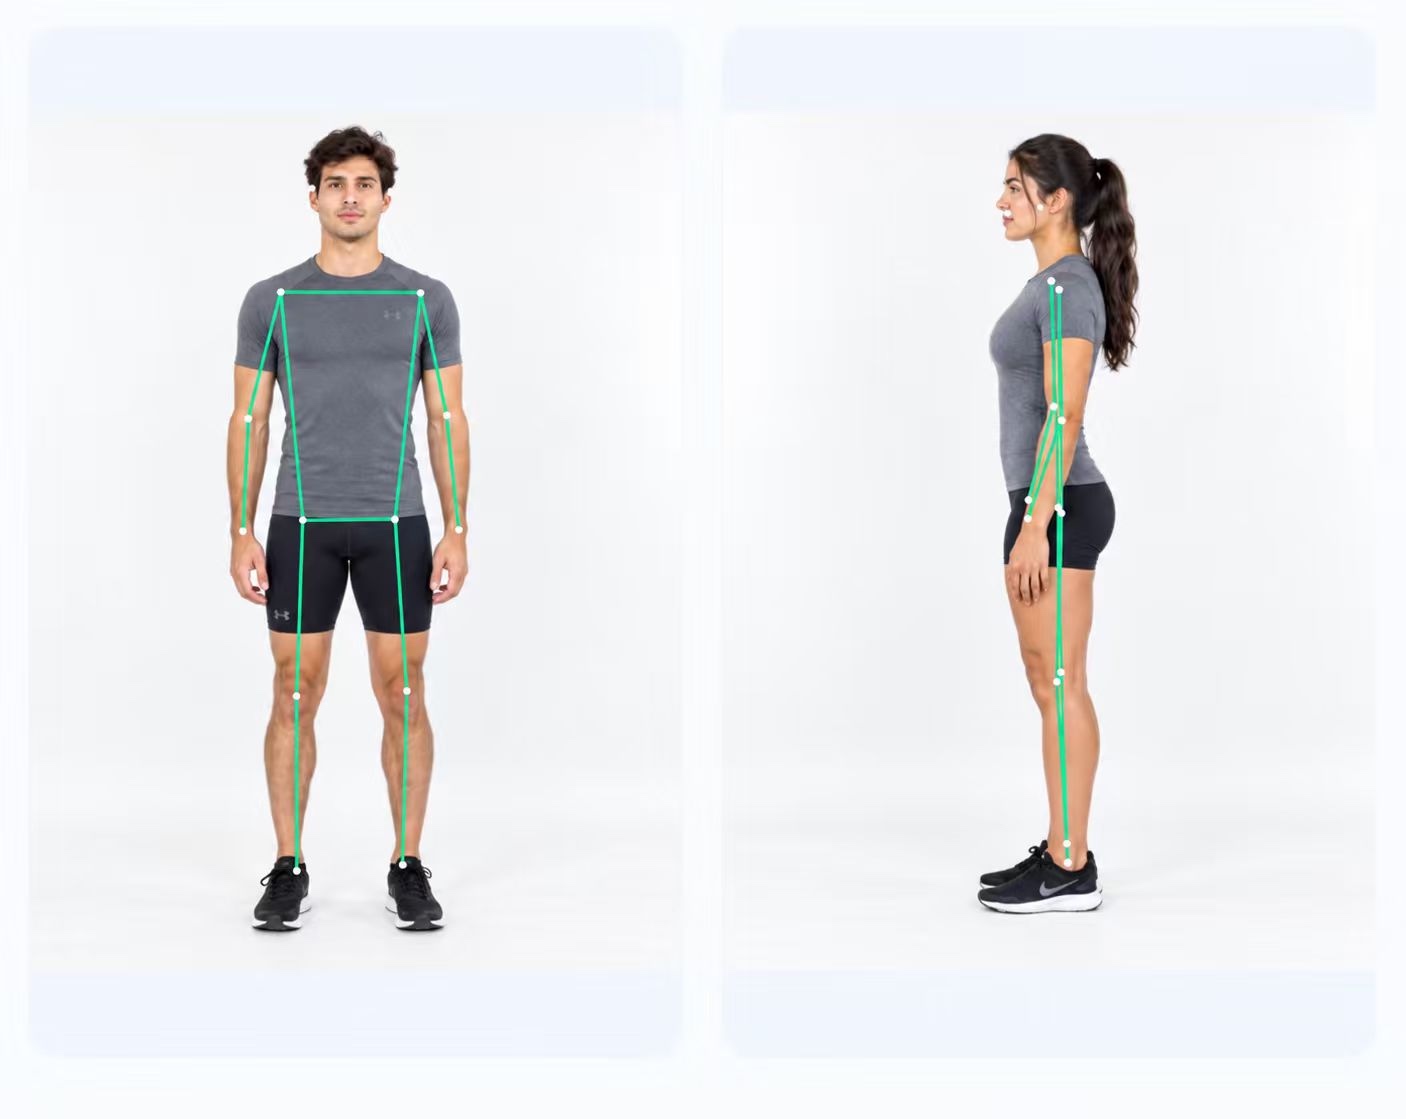
PoseAlign lists pelvic tilt in degrees as the second row of the side-view table, under the forward head angle. In the latest example on the site, pelvic tilt is 1.6°; an earlier PDF export dated September 15, 2026 shows 0.8°. Neither value is highlighted.
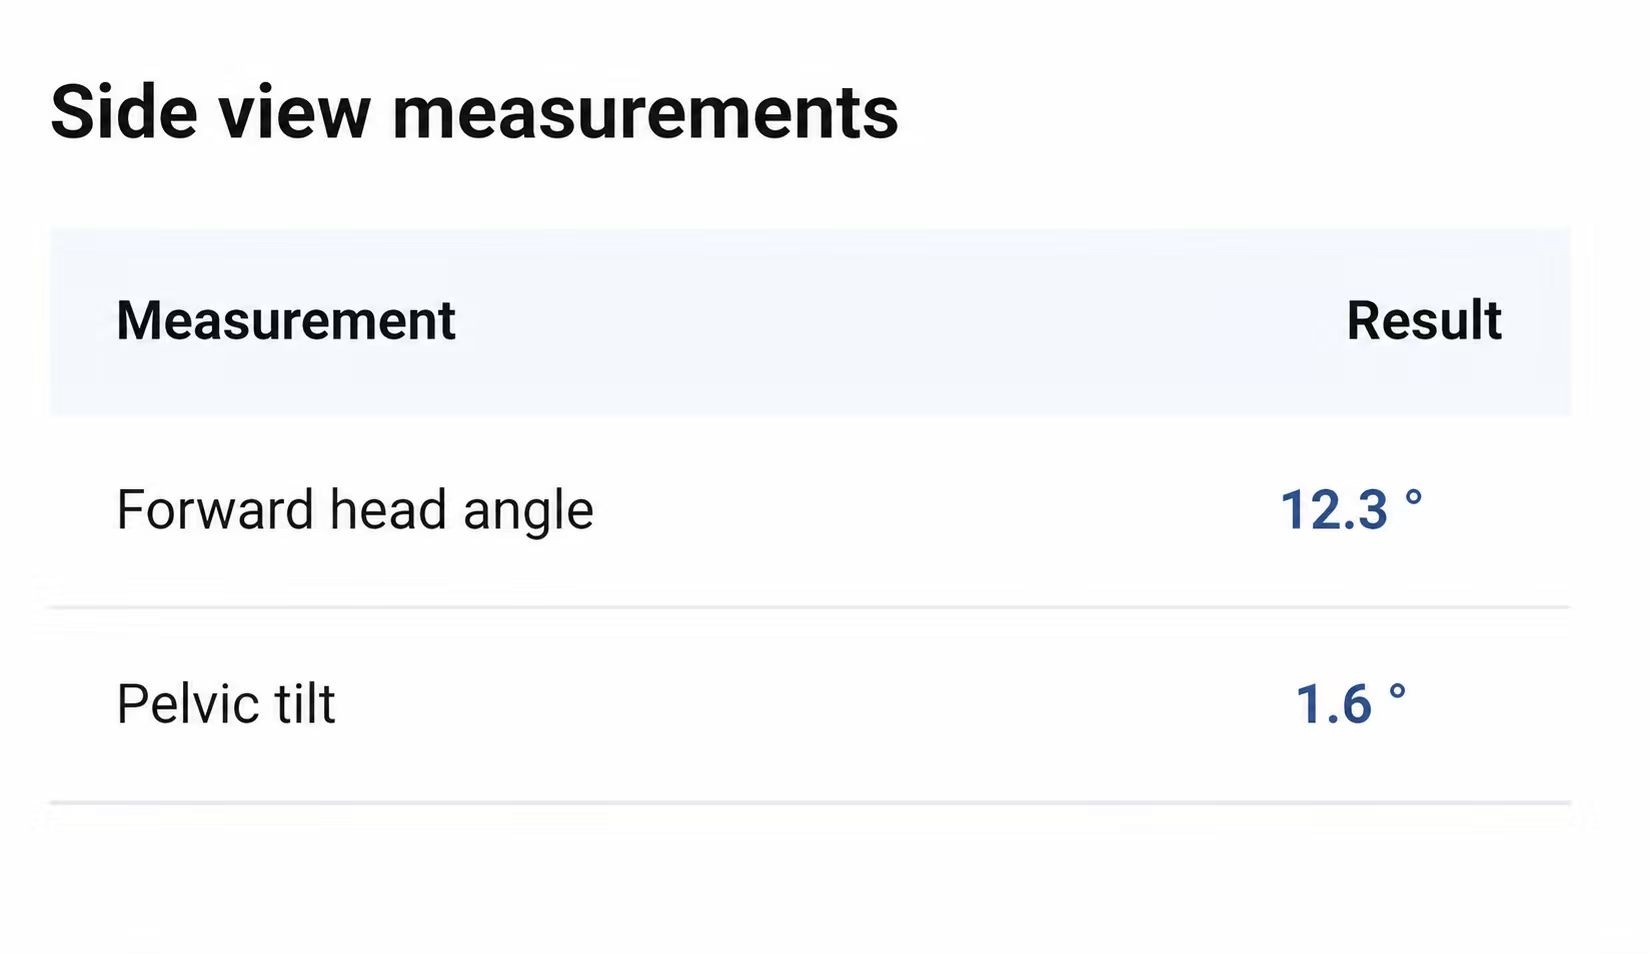
PoseAlign does not publish the formula behind its pelvic tilt value, which points it uses, which direction of tilt a larger number means, or the rule that highlights a value. Read it on its own scale. Do not compare it with ASIS–PSIS angles from studies, such as the 13° cadaver mean above, or with a value from another app or a clinic, and do not treat the example values as targets.
Both side-view rows come from the same photo, so a lean toward the camera, a slump or a slight turn can shift both at once. When both values change between two of your reports, check first whether the stance or camera changed. The forward head angle is covered in how the forward head angle differs from the craniovertebral angle.
Pelvic tilt is a separate measurement from pelvic level. Pelvic tilt comes from the side photo, in degrees; pelvic level comes from the front photo, as a percentage, and is explained in how pelvic level is measured in a photo. The side-view analysis page shows both side-view results, and the guide to reading a posture analysis report walks through the whole report.
The report draws the detected points on each photo. In the example side photo on the PoseAlign site, the arm hangs alongside the hip, so check where the hip point landed before you read the number.
How to take a side photo for a consistent reading
- Wear the same fitted shorts or leggings and a fitted top, with no belt.
- Put the phone on a stand, level, at the same height and distance each time.
- Stand fully side-on to the camera, head to feet in the frame.
- Let your arms hang relaxed in the same position each time.
- Look straight ahead, weight on both feet, and use the self-timer.
- In the report, check that the hip point sits on your hip, not on your hand or wrist.
- Take two or three photos and see whether the value is stable before you rely on it.
Our guide on how to take posture photos covers distance, light and background. PoseAlign is not a medical device and does not diagnose or treat any condition. If your lower back hurts, a photo will not explain why. The NHS advises seeing a GP if back pain does not improve after a few weeks of home treatment, stops you doing day-to-day activities, or is worse at night, and calling 999 or going to A&E if you have pain, tingling, weakness or numbness in both legs, loss of feeling around your genitals or anus, changes in bladder or bowel control, or pain that started after a serious accident.